
Buying Lenses – Do you know what to buy?
17th April 2019
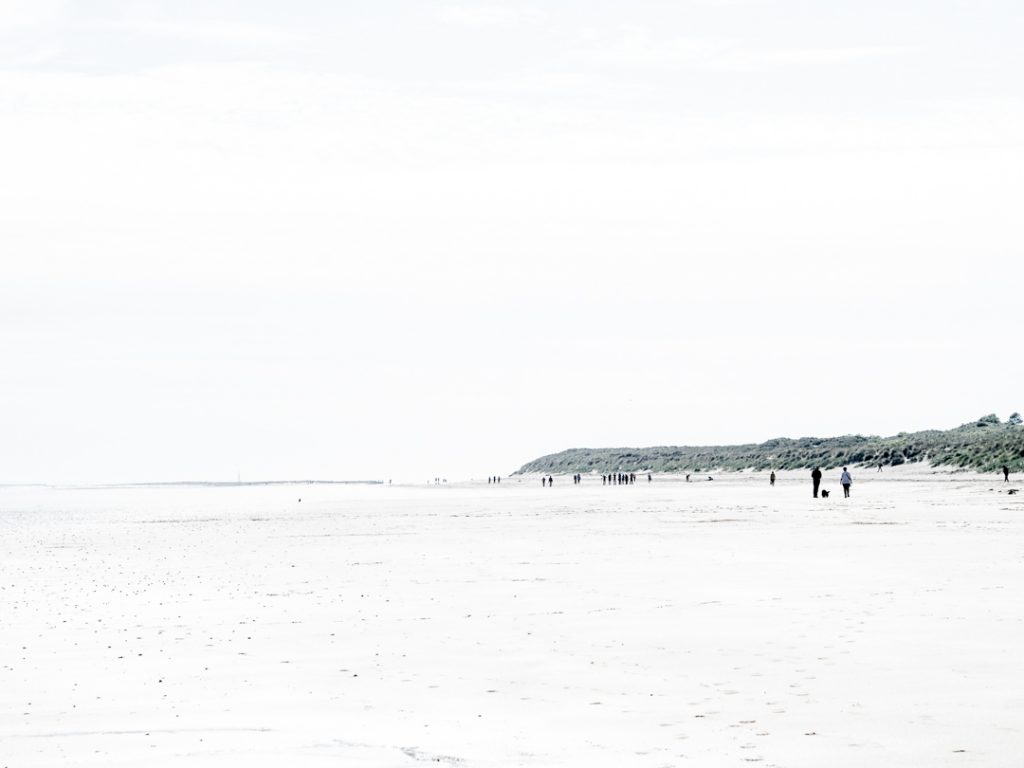
Street Life – venturing into Street Life Photography
7th August 2019I can’t be doing with snobbery in photography. I watched a video on YouTube by a well-known photography commentator insisting you must use full frame. Balderdash! Whether that condescending attitude was down to his superiority delusions or that he is sponsored by one of the full frame camera manufacturers, I don’t know. Search through any photo hosting site for any camera and you will find fantastic images shot with that make and model.
The secret is knowing how to take a great picture is firstly having the ability to see a photograph. Then you need to be able to compose great shot. Next comes the technical skills of setting up the shot. The lens quality comes fourth and the camera is the least important factor.
Thinking about settings
There is also an elitist mantra, and variations of it, that I hear a lot: ‘Manual is for Masters, Shutter for Students and Aperture for Amateurs.’ My advice is to ignore that too. It’s hogwash. There are people who can control a camera’s technical settings but cannot visualise a great picture.
Despite saying that, learning to override the camera’s automatic controls is worthwhile. Discovering how and when to change the settings will help you get even better photographs.
Do you ever put your camera into its manual mode? Are you ever trying spot metering or exposure compensation? Do you ever manually focus? If not, now is a good time to learn to do it. Choosing different focusing, metering and exposure methods can make all the difference to making that perfect composition really stand out from the crowd.
Why use manual controls?
You know those moments when your camera doesn’t behave as expected. Getting to grips with the settings and overriding the automatic defaults will allow you to create the photograph you envisaged. You will not be relying on the defaults that give you an average picture.
For example…
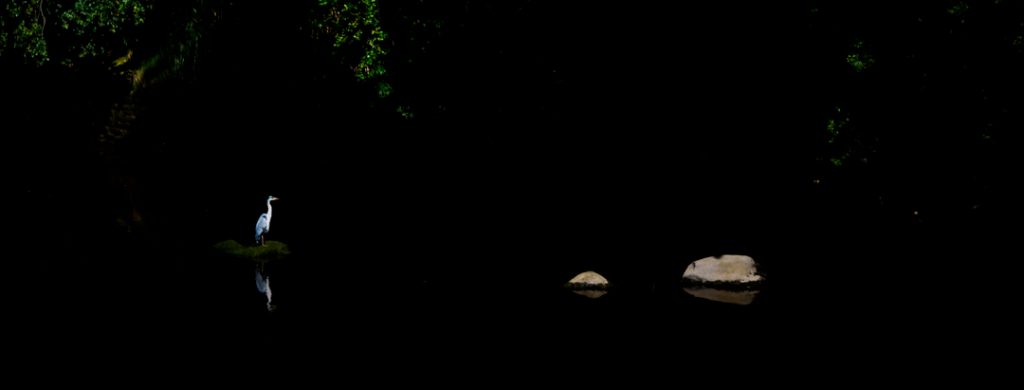
With the image above I chose spot metering to bring the sun-lit heron into the middle of the exposure. Doing that also darkened down the unlit surrounding trees and water.
With this shot – and 95% of the time – I am using Aperture Priority. Why that mode? Because it is easy, quick and hard to accidentally get wrong when in a hurry. Most of the time I am thinking more about the composition than I am the camera’s setting. With the shot above, it would have made little difference to it’s look if I had changed the aperture four stops in either direction so long as the shutter value changed by four stops too. Why not let the camera work that out?
I do use aperture priority in conjunction with exposure compensation too.
95% of the time I am also using an auto-focus mode: single autofocus for stationary subjects and continuous for moving. There are exceptions. For instance, I invariably use manual focus and exposure for landscapes, panoramics and macro. Then I am also working out the hyperfocal distance too. But there is nothing wrong with using the semi-automated Aperture Priority to help get the shot you try to achieve.
My camera’s behaviour
Many cameras have that ability to remember groups of settings. On mine, with a turn of a dial, I can select the settings I’ve created for birds in flight or portraits or landscapes.
Historically, on custom set 2, I had spot metering tied to one focus point. The camera was also set to continuous autofocus and aperture priority. This was really useful combination for capturing pictures of wildlife. As animals or birds moved closer to the me, the camera continued to focus on them and the light measurement stayed on them too.
I had forgotten that on my newest camera, an Olympus OM-D E-M1 mark II, I had enabled focus tracking as a demonstration on a course I ran. Similar to continuous autofocus, instead of adjusting the focus as the subject’s distance changes, tracking allows the camera to follow the subject as it moves position within the frame. However, the spot metering stayed in the one place. Consequently, as the camera tracked the subject it sometimes ended up metering the background and not the creature I was focusing on. That was not what I wanted.
My choice of settings for birds in flight
Keeping the aperture the wide open, I just had to monitor the shutter value to ensure it did not get too slow for the subject or focal length. If it did, I could easily increase the ISO, although I prefer using the base ISO whenever possible.
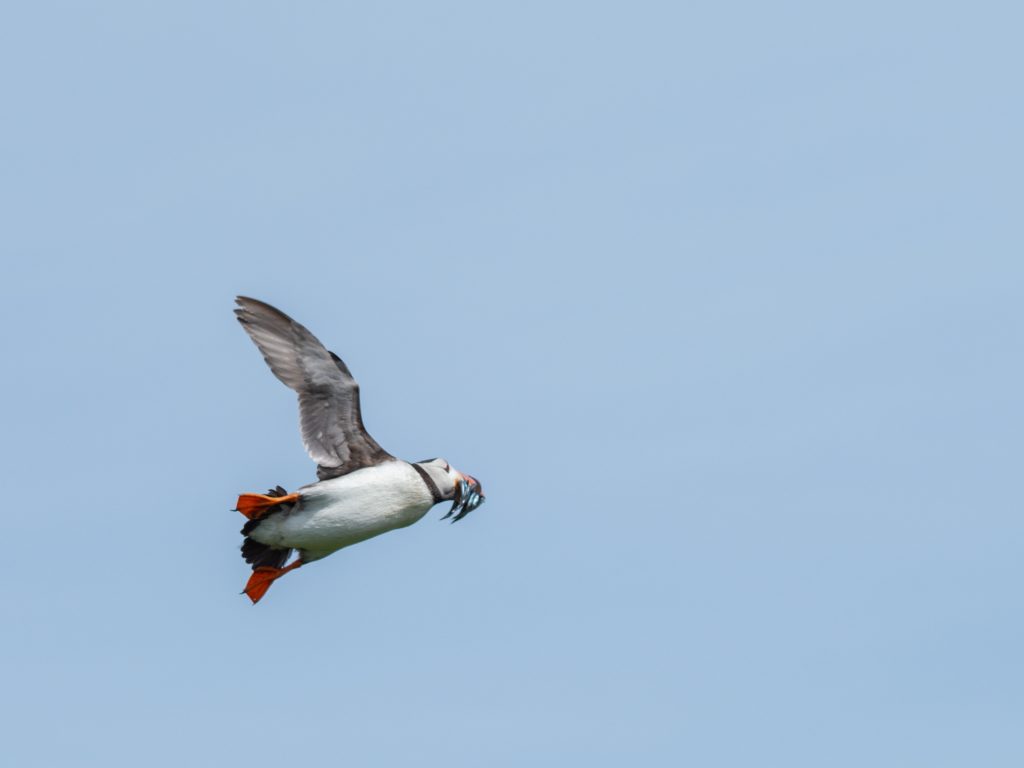
With the picture of the puffin below, I was shooting wide open and just had to check the shutter value stayed fast enough to stop the bird’s movement. Many people prefer Shutter Priority (Time Value) for birds in flight but I stay in Aperture Priority and monitor the shutter value I am achieving, adjusting the ISO if necessary.
I had to make a choice which feature I wanted to use. One option was to switch off the tracking and use spot metering as I did before. I would then rely on my ability to move the camera to follow the subject. That’s something I am quite good at doing: it takes practice. (Handy hint: keep both eyes open as it is easier to spot and track incoming birds.)
Alternatively, I could lock the metering when I first acquired focus and keep tracking switched on. This would be fine in the majority of circumstances as light does not change greatly on a flying sea bird, my most frequently shot wildlife subject.
My third option was to use an evaluative metering mode. I would then then adjust the exposure compensation manually to expose the shot correctly as the bird flew past.
There are many ways to achieve the same result and often it is down to personal choice.
What the reviewers would say about that
Ideally, the spot metering should follow a subject as it is tracked around the viewfinder. I can see camera reviewers making a big fuss over this small thing. They are good at that and it is what they are paid to do. Maybe it is a feature that’s available with another brand’s flagship model. (If yours does this, I would be interested to hear.)
Actually, it is not that important to me. I cut my photography teeth with film. My old Olympus OM2n had manual focus and average TTL metering. That was far less sophisticated than modern evaluative metering. Furthermore I’ve discovered, having tried many different cameras, focus tracking has its limitations. It can easily lose focus on a cluttered background.
Also, with all cameras I find the focus can be a bit off when using tracking. Consequently, the subject’s eye will be soft. It’s useful but not perfect. I do get consistently better results with tracking turned off on all cameras I have tried.
A slight digression
One annoyance in photography is the lack of compatibility between systems. There have been attempts to standardise. Four Thirds and DNG raw being two examples. But it gets silly when different systems have different nomenclature for similar functions. Time Value and Shutter Speed are the same thing. Canon got it right with the former description as the shutters always move at the same speed. It’s the interval between one opening and the other closing that changes not their speed. However, Canon also get the stupid name award for AI Servo, which the rest of the world calls Continuous Autofocus (C-AF). Evaluative Metering in Canon is called Matrix in Nikon and Multi in Sony but the silly name prize goes to Olympus for calling it ESP! (Electro-selective pattern.)
Metering and Focus again
After experimenting again, I actually abandoned spot metering and reverted back to my oldest method of shooting birds in flight. In ESP mode, I manually adjust exposure compensation using the camera’s front dial. Also, I use a small fixed group of focus points. That works best for me when photographing birds in flight, far better than focus tracking. It might be different with your camera, so it is worth experimenting to see what works for you.
Focusing, Metering and Exposure
There’s a lot to be said for going back to basics. Understanding how focussing, metering and exposure work are the cornerstones of creative photography. Automation, though doing a reasonable job of assessing a scene, does not offer the same versatility and control as manual adjustments. But, discover what works best for you.

I do like to manual focus. When I am using vintage lenses, I have no choice. But I do use autofocus most of the time. However, one of the big disadvantages of modern DSLRs is that the manufacturers put much smaller viewfinders in their cameras than they did the old film SLRs. Consequently manual focus is much harder to achieve. DSLR manufacturers expect photographers to use autofocus.

The Mirrorless Advantage
My mirrorless cameras have large and bright electronic viewfinders. Bigger than the viewfinder in most DSLRs. That is one of the many reasons why mirrorless sales are now outstripping DSLRs. Manufacturers are also abandoning DSLRs in favour of mirrorless.

Better still than their large, bright viewfinder, mine have two extra functions that assist with manual focus. I can zoom the viewfinder to check focus accuracy. I can also have a custom button set up so that the sharp, in-focus edges are outlined with a coloured line. Furthermore, I can see the histogram through the viewfinder, and invaluable tool for getting the correct exposure.
Be Versatile
Versatility of techniques and skills helps us improve our photography. Although a fan of manually creating an image, getting assistance from the technology can really help.
However, relying solely on advanced technology, one may as well leave the camera on auto and hope for the best. Learning your camera and discovering what the settings do is a sure way of getting better photographs.
Want to learn more?
Was this article was helpful for you, but would like to learn more? Exposure compensation and focusing methods are covered in my courses. I run three levels of training. Bronze basic courses get you to take your camera out of auto mode and discover manual adjustments. We also look at basic compositional techniques. Then, the Silver courses take this a step further. On these courses we look at more advanced camera controls and composition. Finally, on the Gold courses we discover advanced techniques. I also run bespoke one-to-one workshops tailored around your existing knowledge and a complete 40 week course.


4 Comments
Excellent piece thank you Ivor .
I’m sure it has been so since the advent of photography but these days so so many images I see have become works of art through the ingenuity and creativity of the image manipulator ..often thinking to myself that perhaps it’s more about the level of knowledge of post process techniques . A lot of very cheap apps out there can turn our images into something way way beyond taking the photograph. I have a poppy field image that demonstrates that …whether the final result is to anyone’s taste is a different matter
Best regards
Graham
Hi Graham, thanks for the kind comment. Yes, post processing is another topic altogether. Developing and editing image I covered here a few months back: https://ivorphotography.co.uk/developing-software/ Adjusting the look of a photo by selectively changing exposure is as old as photography and great photographers like Ansel Adams, Cartier-Bresson and others all did it. Every professional photographer does develop their images still, though more so digitally. Automation with modern apps makes that process all the more accessible to everyone. But like learning manual controls of the camera, getting the exact results you visualise requires learning skills.
I tend to use Aperture priority 90% of the time. I also love to take panoramas where full manual is my go-to after I use the camera’s metering system yo determine the brightest area then set manual to that exposure. This makes Post Processing much easier.
I do too. Despite all the nonsence written about having to use manual mode, I find aperture priority and having the front adjustment wheel set to exposure compensation far quicker to adjust, plus the exposure setting is going to be within acceptable parameters when I just grabs the camera and fire off an unplanned shot. Being able to see the histogram within the viewfinder along with the aperturte and shutter settings makes manual mode superfluous in a lot of cases. Being able to use manual mode, understanding how exposure works, is an essential skill though.
The only time I am using manual exposure and focus is with long exposures and landscapes using ND filters.